Connecting to customers and/or subcontractors
With Okappy, you can easily connect to your customers and subcontractors from the web dashboard.
Once connected, you can receive jobs from your customer, allocate them to your employee or subcontractor and share the latest status of your work as it’s updated by your engineers out in the field.
Read on to see how to add customers or subcontractors.
Adding customers or subcontractors
To add a customer or subcontractor when logged into your Okappy dashboard, click on the connections icon towards the top right of the screen ( ![]() ) and select + New customer or + New subcontractor.
) and select + New customer or + New subcontractor.

Enter your contacts email address and click Next.
If you’re connection is already on Okappy, simply press Connect.
Otherwise, enter their details in the next screen.
Type in the your connection’s details including:
- Company name
- Contract first and last names
- Contacts email*
- Telephone
- Mobile
- Address1
- Address2
- Address3
- Town
- Country
- Postcode
*Emails are used as a unique identifier within Okappy. It is therefore mandatory and should not have been used previously.
An invite will be sent to the specified email.

Note: If the invite has not been received, please check the email that you have used, and that it has not ended up in their spam or junk folders.
Re-sending an invitation
If you’re connection has not accepted your invite, you can send a reminder by going to the Connections screen. Find your connection and then click Re-send invitation.
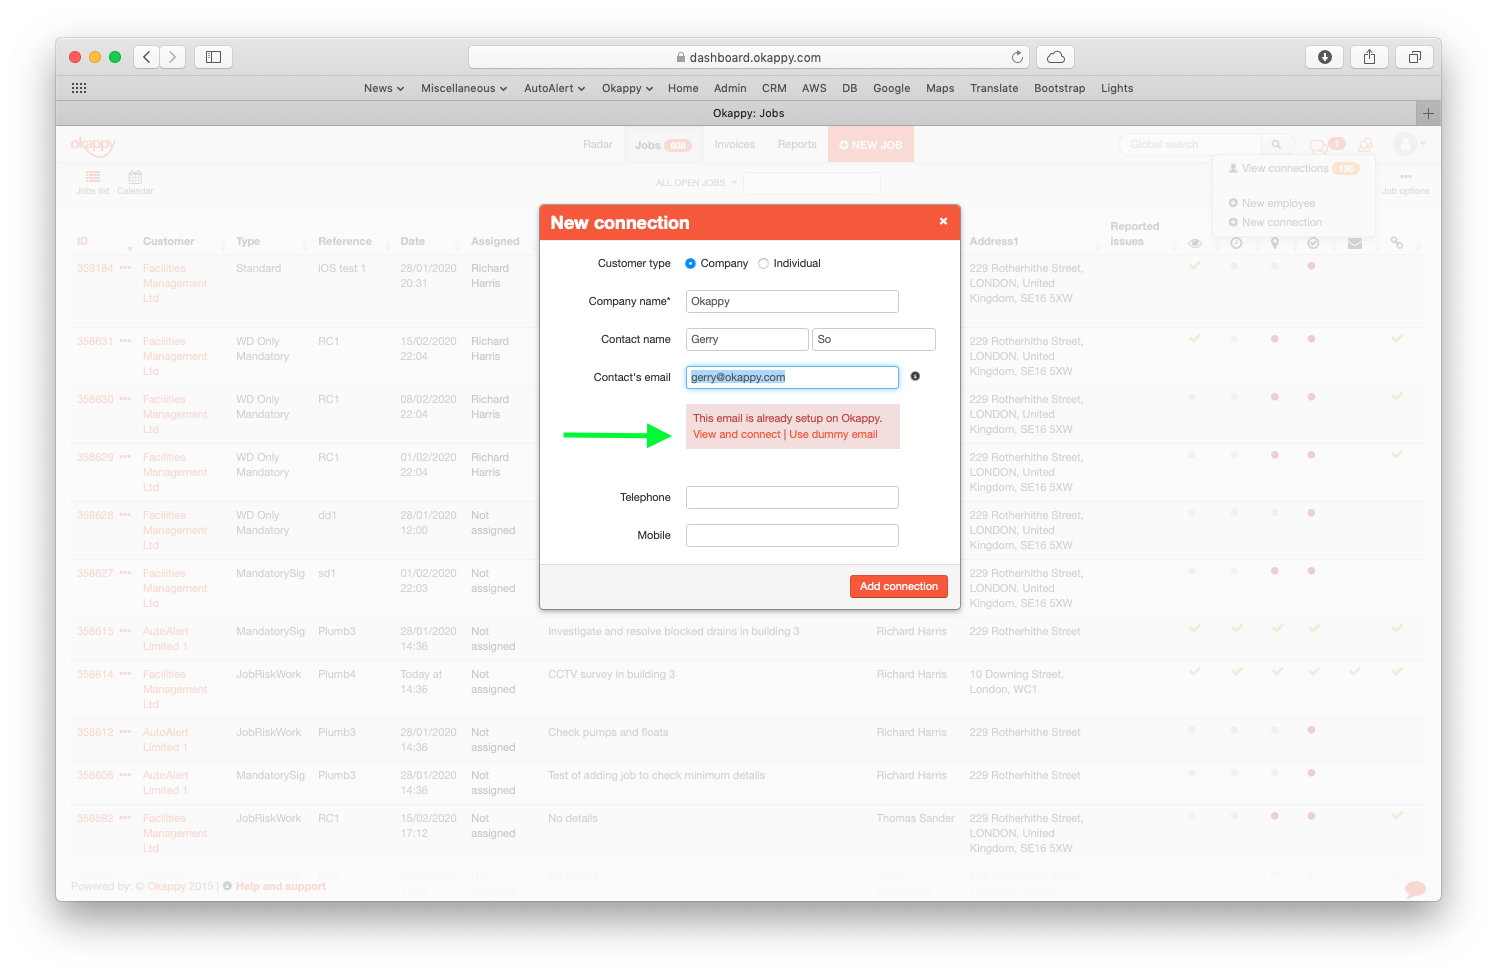
If the email has already been used
If the email has already been set up on the Okappy network, you will be alerted with a message under the email field.
You can either click View and connect to see the original connection and then connect to it. Or, let the system suggest a unique dummy email address and then use that email instead.
Select whether the connection is your customer or subcontractor and choose whether to send an email to them advising that they have been set up on Okappy.
If you send an email to your customer they can log in and view jobs you have done for them and also send you jobs.
If you invite a subcontractor to connect with you, they will need to authorise the invitation before you can allocate work to them.
Authorising a connection request
If you have invited a subcontractor to connect but you can’t see them as an option when adding a job, they will need to first authorise the connection.
Likewise if you’ve received a connection request from your customer or subcontractor then you will need to authorise their connection.
To authorise a connection request that you’ve received, log on to Okappy using your login details or click the button in the connection invite email. Once logged in, you will see an alert saying that there are connections pending.
Note: If you have not received a connection invite, please check your spam or junk folders.

Click connect on the alert at the top of the page or go to connections ( ![]() ), view connections and then select either customer or subcontractor.
), view connections and then select either customer or subcontractor.
Note: If your subcontractor is authorising your connection, they will need to select customers in their Okappy dashboard in order to see your connection request.

Simply click the authorise button to allow the connection.
Once the connection request has been authorised by your subcontractor, you will be able to assign jobs to that connection.
Likewise if you have authorised a connection request from one of your customers, you will be able to add and receive jobs from them.
Setting or changing passwords
Like any other social network, every account created on Okappy is independent. Therefore passwords will need to be set by the account owner.
A temporary password is set up initially. Your connection can change this when logged into the Okappy website or app. If they forgotten their password, they can reset it using the email used to set up their account.
For more information about changing or resetting passwords on the web, see
And on mobile devices, see