Email a job sheet
Keep your customers in the loop with the status of their jobs at the click of a button.
With Okappy, once your engineer has completed a job, you can email the job sheet to your customer immediately. Your customer can see what was done on the job and you can get paid quicker. Your customer can also log in from the job sheet to view the status of all their jobs.
There are a couple of ways to email the job sheet to your customer. Below is our quick guide showing how to email a job sheet to your customer or to another person.
Emailing a job sheet from the Dashboard
Firstly, from the Dashboard, click on the more icon ( ![]() ) next to the job you want to email.
) next to the job you want to email.
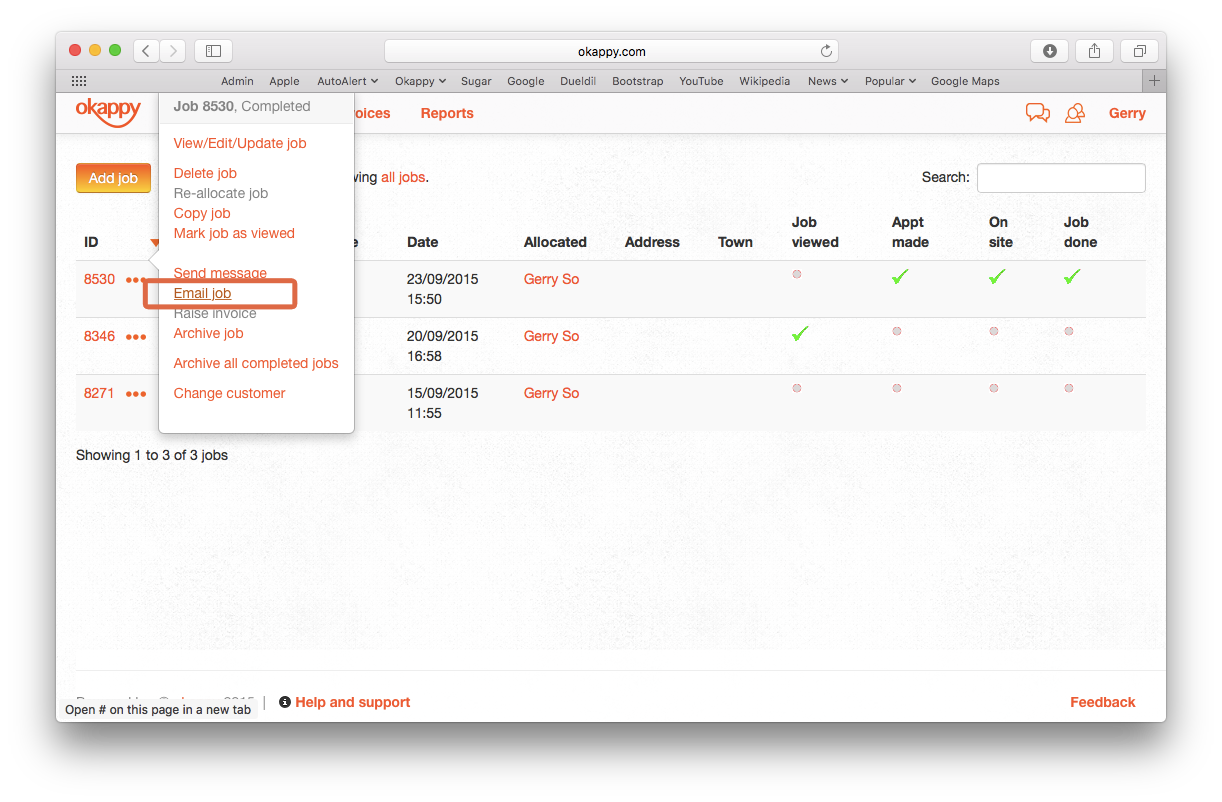
Click ‘Email job’, the following screen will pop up.

- Select the email address of the person you want to send the job sheet to.
The customers email will be automatically available in the drop down. You can also choose your own own email address, add a different email address or send to multiple email addresses by using the semi-colon (;) to separate each email address.
Okappy will learn from emails sent previously and provide the same email addresses next time you send an email to that customer.
- Click the eye icon (
 ) to preview the job sheet
 - You can add additional notes to your email which will appear in the body of the email which gets sent to your customer.
- Click Send email to send the job sheet to the selected email adedress.
If you don’t want to send the email via Okappy, you can also open the email in your own email programme by clicking the envelope icon ( ![]() ). For further details on using your own email programme – see our post about setting your default email client.
). For further details on using your own email programme – see our post about setting your default email client.
Emailing a job sheet from within your job
Alternatively, you can view or edit the job first and then email the job sheet directly from the job to your customer.
Access the job by clicking its ID or by clicking the Three dots icon ( ![]() ) next to the job you want to edit and then click View/Edit/Update job.
) next to the job you want to edit and then click View/Edit/Update job.
You can check the job details entered by your engineer and/or view any attachments such as photos, documents or signatures.
Once you’re happy, scroll to the bottom of the job sheet where you will see three icons. You can either print the job sheet ( ![]() ), add more attachments (
), add more attachments ( ![]() ), email the job sheet (
), email the job sheet ( ![]() ) to your customer or preview (
) to your customer or preview ( ![]() ) the job sheet before you send it.
) the job sheet before you send it.

To email the job sheet to your customer, simply click the email job sheet icon. Fill in the details as above and click ‘Send email’.
Hope this helps. Check out our help and support centre for more tips and advice or find out more about Okappy Job Management.