Optimise Your Administration with Okappy Timesheets
In the field service industry, digital timesheets can be essential. Okappy offers versatile solutions to monitor hours worked, tailored to your specific needs.
There are three different ways you can capture hours worked. 1) You can create a timesheet as a check sheet which your technicians can fill out at any stage. 2) you can add a timesheet to one of your job templates so and capture hours worked for a job or customer. Or 3) automatically using data from our mobile app or GPS tracking devices.
Discover how to efficiently track employee hours below.
You can create a timesheet check sheet using the check sheet builder.
Once created, your engineers can simply click the Add check sheet button from within their mobile app to start adding their hours.
Filling out a timesheet on your mobile
From within the jobs page on the Okappy app, simply
- Click the Okappy icon
- Select Add checksheet.
- Choose the timesheet checksheet that has been created,
- fill in the details, and then
- press Submit.
Viewing completed timesheets
To view completed timesheets
- Go to Reports,
- Select Connections,

- select Timesheets from the employee section
- Select your dates
- Click Generate report
All timesheets submitted over that period will be shown.

You can export the report to Excel or Google Sheets or click the magnifying glass to view the completed timesheet.

You can set up job templates using the job template builder. This enables you to add different timesheets for different customers and to allocate hours more easily to your customers.
For more information on how to use the job template builder, see our Creating custom job templates
When you are building your template you can add a work done checksheet and include fields such as day of the week, checkboxes i.e., overtime and drop down fields with additional options.
To fill in the template you can either create the job in the office and then assign it to your engineer. Or if your engineer is enabled to add jobs, they can add the timesheet themselves from within the Okappy app.
Adding a timesheet from the desktop
You can add a timesheet from the office by
- Clicking the New jobs button,
- select your timesheet from the job type dropdown.
- Add a reference, then
- allocate to your engineer.
Your engineer will receive the timesheet on their mobile device in the same way they receive any other job.
Adding a timesheet from the mobile app
Alternatively, your engineers can add their own timesheet when they are out in the field providing they are enabled to add jobs.
To add a job from within the jobs screen on the mobile app
- click the Okappy icon
- Click New job
- Select the timesheet job
- Step through the options, and
- Click Submit job
This will create a timesheet which can then be completed.
Completing the timesheet
- Click into the time sheet job on your mobile app
- Click Update job as on site and Enter work done
- The timesheet fields will be shown based on your timesheet set up
- Enter the details of time worked
- Click Submit
- Click Complete job
Your timesheet will be updated and will drop off the device.
Viewing completed timesheets
To view completed timesheets
- Go to Reports,
- Select Connections,
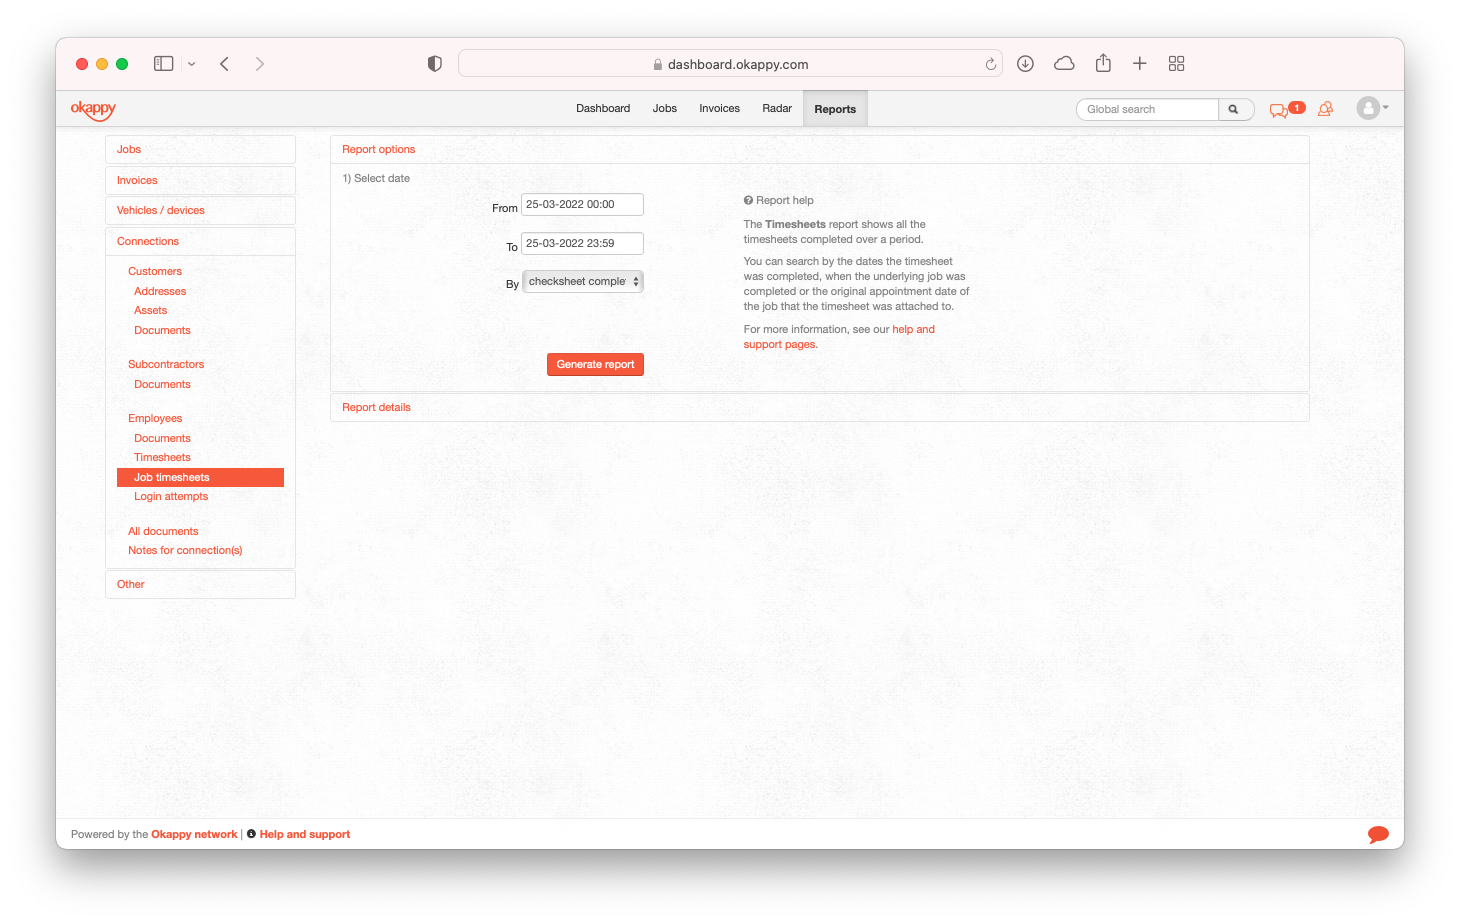
- select Job timesheets from the employee section
- Select your dates and date type
- Click Generate report
All timesheets submitted over that period will be shown.
You can export the report to Excel or Google Sheets or click the magnifying glass to view the completed timesheet.

The benefit of using tracking data from the Okappy app or Okappy GPS tracking devices is that the data is gathered automatically. All the engineer has to do is start the vehicle or log in to their Okappy app and then stop the vehicle or log out of the Okappy app at the end of the day.
The timesheet will be generated automatically from the first start or login to the last stop or log out of the day.
To view the hours worked,
- Go to Reports
- Select Vehicle / devices
- Choose either the Working times report or the Working times all report.
The Working times report shows the working times for a given engineer or vehicles over a particular period. The Working times all report shows the working times for all engineers or devices over a period of time.