Using Xero Inventory items when raising invoices in Okappy
Okappy is a Xero premium partner. Using Okappy with Xero allows you to create information such as contacts and invoices in Xero automatically. Information also flows from Xero to Okappy allowing you to use inventory items and their related prices when creating invoices.
Read on to find out how to set up inventory items in Xero and how to use the inventory in Okappy.
Set up inventory items in Xero
To set up inventory items in Xero,
- first log in then click the business tab,
- select Products and Services
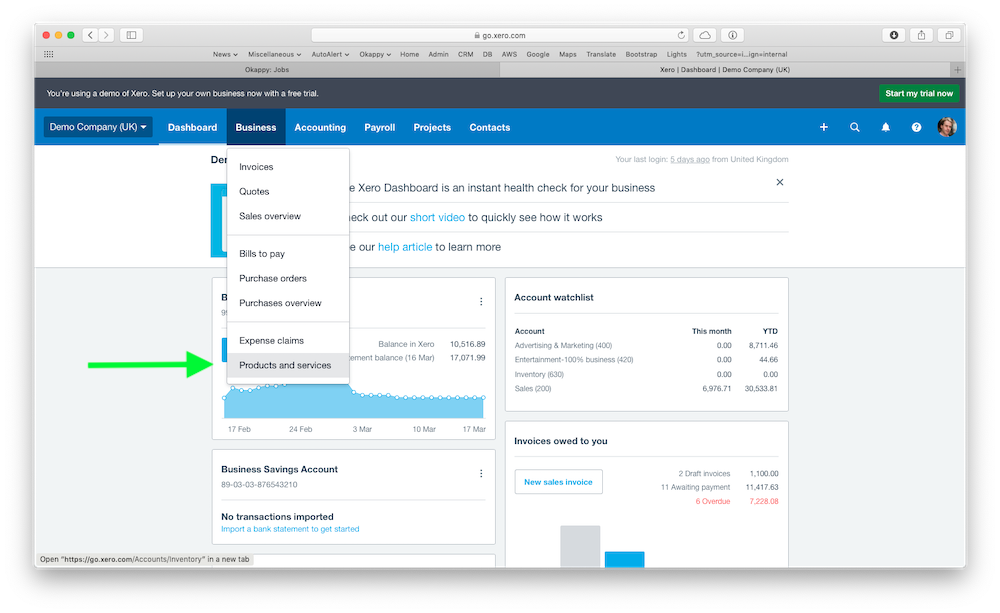
Click + New item

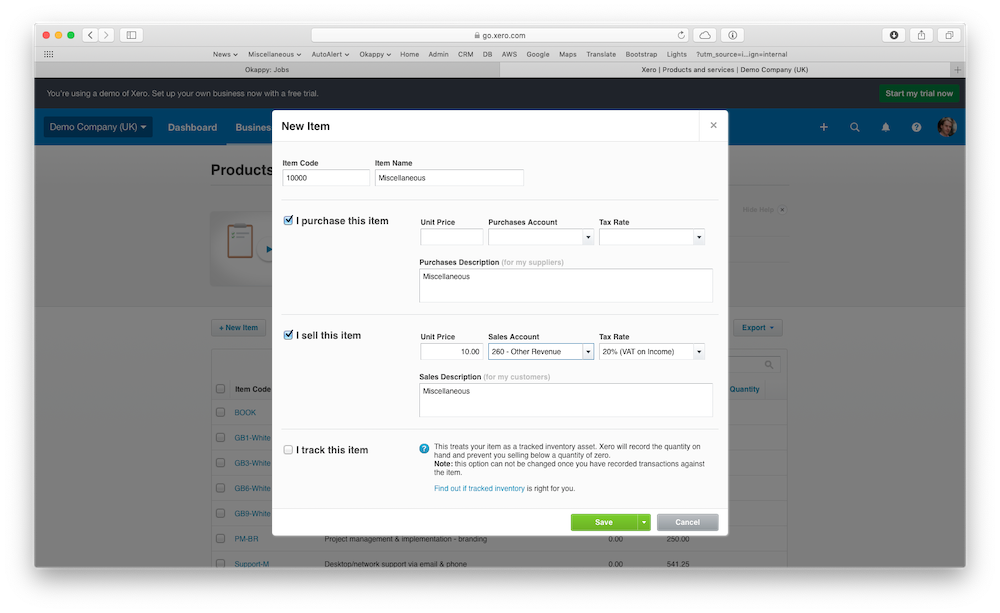
Enter the details for your new item.
If you are raising a sales invoices within Okappy and want to use your inventory, then ensure the I sell this item checkbox is ticked. If you are raising a purchase invoice within Okappy and want to use your inventory, then ensure the I purchase this item checkbox is ticked.
- Select the relevant account which you want your invoice to post to
- Set the unit price, and the
- correct tax rate
- Click Save
Your inventory item will be created.
Raising invoices within Okappy
Now that you have your inventory items set up in Xero. You can start raising invoices in Okappy and the inventory item will automatically be displayed.
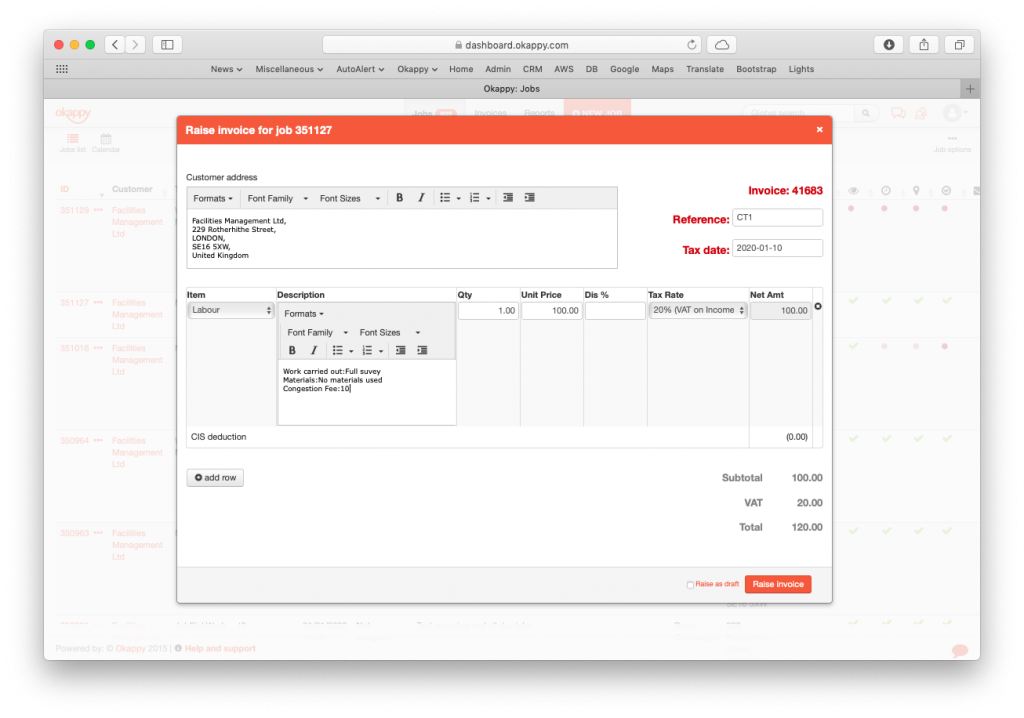
Click items to show the list of inventory items you have created in Xero.
Once the item is selected, the price and tax rate will be added automatically.
You can add the quantity to have the net amount calculated automatically.
You can add multiple lines. Once you’re happy, click Raise invoice.