Input miscellaneous purchase invoices
With Okappy Job Management, you can input miscellaneous purchase invoices for a subcontractor / supplier at any time, then export the invoices to your accounting software such as Kashflow, Sage, Xero or Clearbooks.
Below is a step-by-step guide, showing you how to input a miscellaneous purchase invoice and then export it to Kashflow ( ![]() ).
).
Input a Miscellaneous Purchase Invoice
1) Click Invoices.
Note: If the invoicing option is not enabled, simply click on your name at the top right of your browser, click Settings and then tick the checkbox next to Invoices.
2) Click Raise miscellaneous invoice
The raise miscellaneous invoice pop box will appear.
3) Enter the details you want to appear on the purchase invoice.
You can enter the same purchase invoice number invoice field as the one provided by your supplier.
Once you are happy with the details, click Raise invoice.
4) The purchase invoice will appear on your invoices screen. You can click on the invoice ID to view the final invoice.
Export the Purchase Invoice
1) Once you are ready to export the invoice, click More then Application settings to ensure the correct accounting package is ticked. (In this case, Kashflow ( ![]() ).
).
Click Update defaults.
To export your invoice, click More, then Export to Kashflow (or whatever accounting package you have set up).
Import the Purchase Invoice into Kashflow
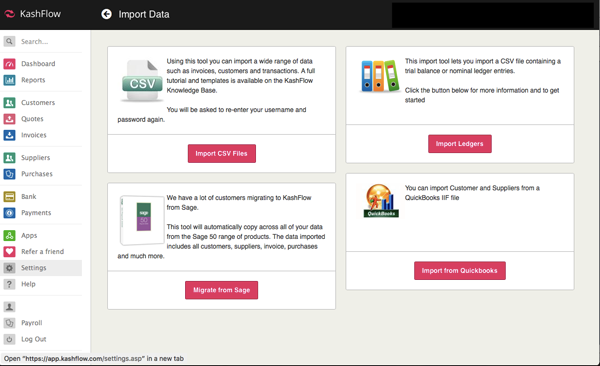
1) Log onto Kashflow. Go to Settings, Import Data then Import CSV Files
2) Enter your login details again and click Login.
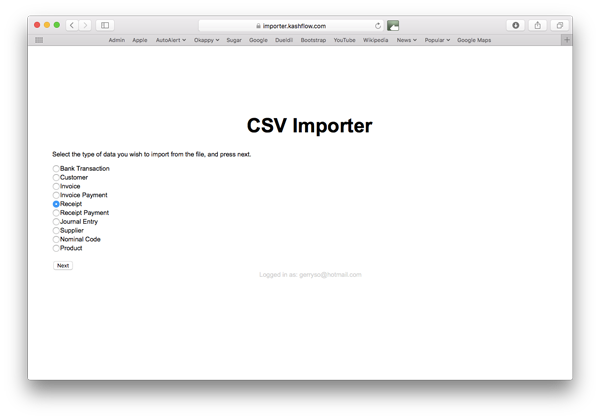
Ensure the CSV checkbox is ticked, then click Next.
Select the type of data you wish to import, in this case Receipts then click Next.
3) From the CSV Importer, check all the fields are mapped correctly. If there are any incorrect mappings, Kashflow won’t import that particular line. Then click Import.
View the Purchase Invoice in Kashflow
1) You can now view the purchase invoice in Kashflow by going to Purchases.
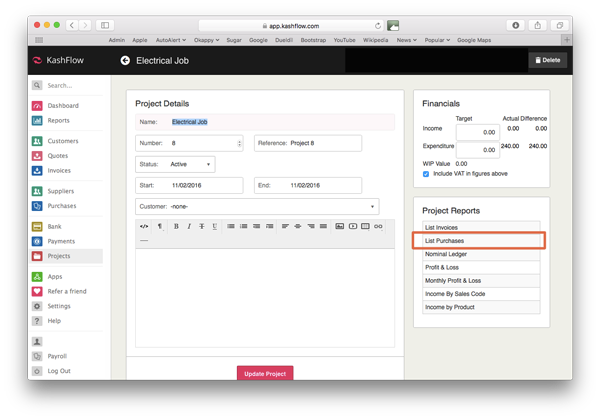
Alternatively, if you have assigned the invoice to a particular project, you can click on Projects, click on the project number that you’ve assigned the invoice to and then List Purchases.
2) To view the invoice, click on the purchase invoice that you just uploaded
Find out more
For more information about Okappy Job Management.


