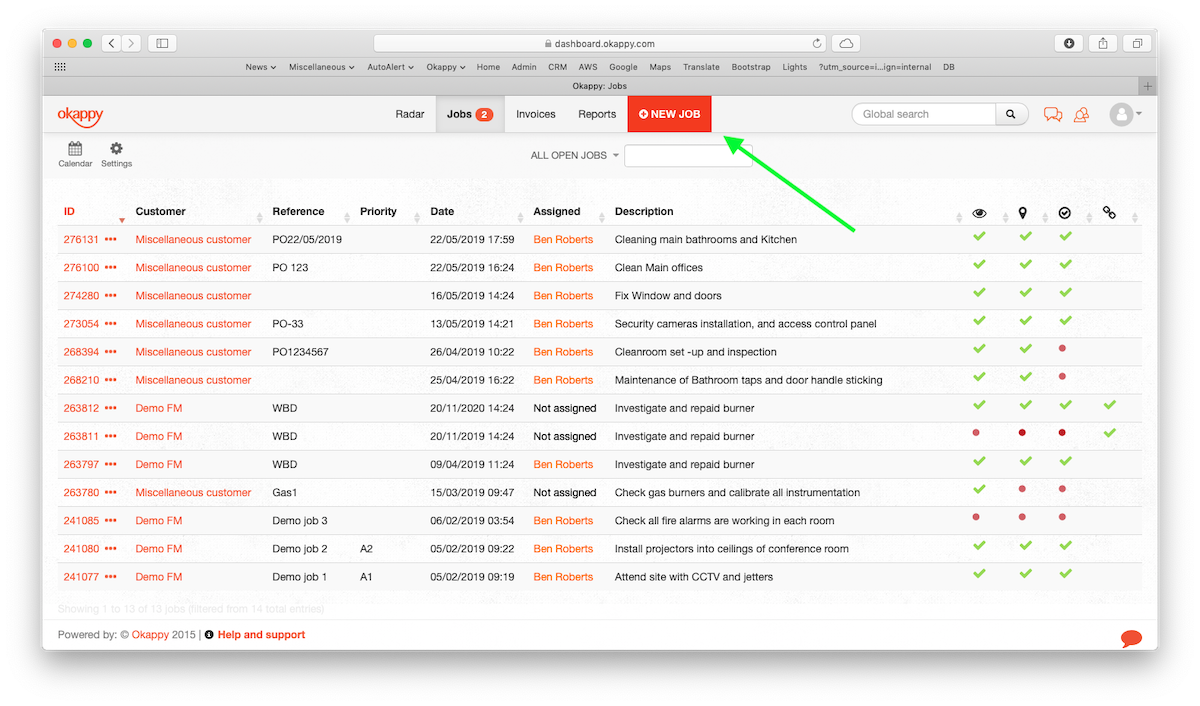
Adding and editing jobs
With Okappy, you can create and receive jobs, allocate them to employees and subcontractors and view the jobs’ status in real time.
To get started, simply click the New job button on the top left corner of your Okappy Dashboard. You can also add jobs (depending on your settings) from within our Monitor applications on your mobile device.
If you have a standard account, you can choose from our standard jobs and quotes. If you have your own bespoke job templates, then select one from the Job type option.
When you change job types, your list of fields will update to match the job template but could include fields like.
- Reference
- Required by/or job date
- Contact details which could include
- First name
- Last name
- Addresses (site address, tenant address, property address etc.)
- Mobile phone
- Telephone
- Alternate contact details (not mandatory)
- Job description
- Others fields

- Select your customer from the customer dropdown or customer search field (depending on your settings).
Note: You can also add a new customer at this stage
- Enter yours or your customers reference
- Select the date the job is required by
- You can choose an end date for the job by clicking on the Change finish time option. Otherwise the end time will default to an hour after the start time (depending on your customer settings)
- If you have contact details in your job template, you can click the use customer details to populate the contact details automatically
- Otherwise enter the first name, list name and address in this case
Note: Okappy learn from previous jobs. As you start typing the name, phone number of address in the address field, Okappy will display a list of suggestions

- Add a mobile telephone number if relevant and or a telephone number
- Enter a job description
- The created by field will automatically pick up your name from your employee settings. This can be changed if required
- Assign the job to an employee or subcontractor, or leave the job as not assigned
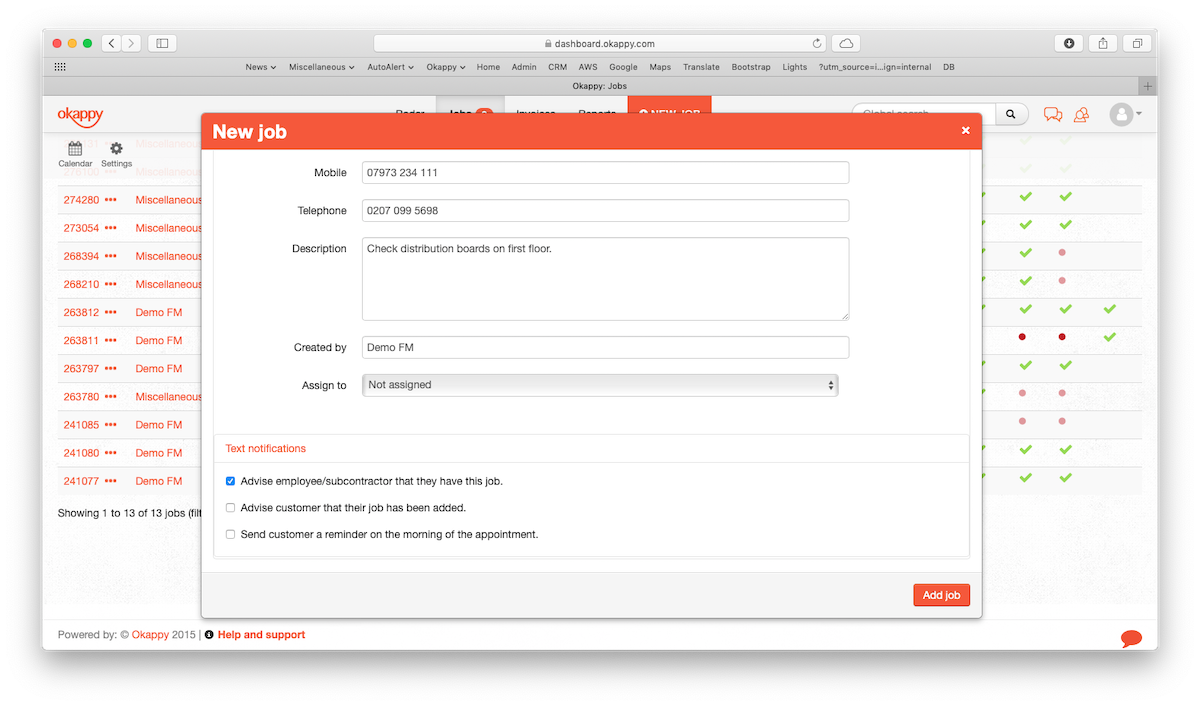
- You can also set whether to notify your customer and or subcontractor that the job has been added
- If so, check the relevant text box. (Okappy will also remember these settings for next time)
- Click Add job

Your job will be added and will be displayed on your dashboard highlighted yellow for a few seconds.
The status column will show red dots when job is first entered. Once the job is viewed by your engineer or subcontractor and updated, then the red dots will change to green ticks. If the job is running late then the dots will start to flash.
See Okappy in action
Want to see this in action, check out our short video – How to add a job