Export your invoices into Kashflow
With Okappy, you can easily export your invoices to external accounting packages such as Sage Line 50, Xero, QuickBooks, Clearbooks and Kashflow.
Check out our step-by-step guide to raising invoices once your jobs are complete and then exporting your invoices to Kashflow ( ![]() ).
).
Check your account settings
Ensure you have Kashflow configured by going to the Invoices screen, click Invoice options and then Account settings.

Click the Kashflow icon. ( ![]() )
)
Add items which can be selected when raising your invoices and then click Update defaults.
Raise your invoice(s)
You can raise invoices for any jobs done for a customer.
To raise an invoice, click the three dots icon (![]() ) next to the relevant job id and click Raise invoice.
) next to the relevant job id and click Raise invoice.

The following pop up will appear.

Information will automatically get picked up from your job (depending on your job template settings) although it can be changed if required.
- Ensure the relevant fields are complete
- Choose whether to raise the invoice as draft or not
- Click Raise invoice.
The invoice will be created and can be viewed in your invoices screen.
If the invoice has been submitted (not draft) it will be also available in your connections invoice received screen.
Export your invoice(s) to Kashflow
To export your invoices to Kashflow,
- Go to the Invoices screen in Okappy,
- click Invoice options,
- click Export to Kashflow.

This will create your invoices file which will be saved down to your default downloads folder on your computer.
At this stage, you can open the file if you want to make any changes or leave the export file as is.

Note: If you do not have any invoices to export, the option to export invoices will not be available in the pop up box.
Import your invoice(s) into Kashflow
Open Kashflow.
Then go to
- Settings
- Import Data, and
- Import CSV file.
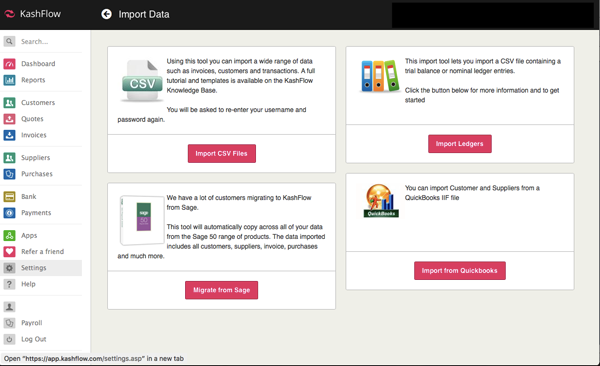
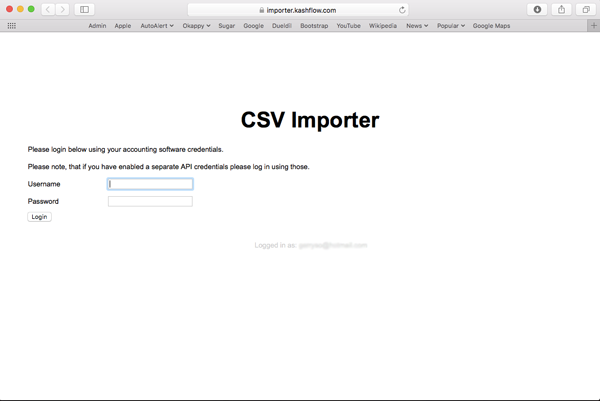
Click the Import CSV Files button, then enter your Kashflow login details again.
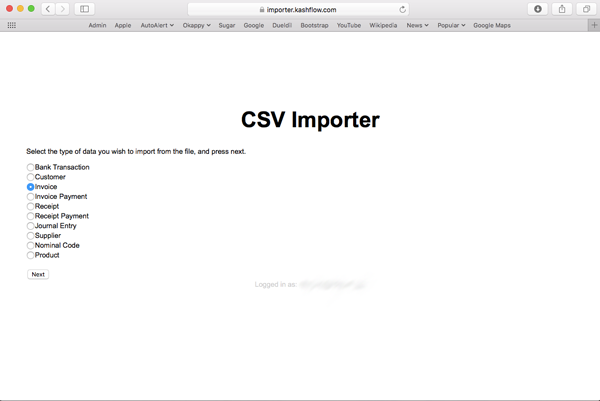
Select the correct file type, in this case CSV then click Next.

Select Invoice then click Next.
Browse to the file you downloaded previously and then click Upload.

Check the box My field row contains column headings and ensure the Column Mappings match up ok.
Click Import.

Note: If there are any errors or unmatched data, you won’t be able to import that line into Kashflow until the issue has been resolved.
You can then go to Invoices within Kashflow to see the invoices you’ve uploaded along with their invoice details.
Note: The invoice ID is the same ID as used in the Okappy Job Management System. You can also reference the Job ID from Kashflow to Okappy or vice versa.


Find out more about Okappy Job Management
For more information about Okappy Job Management and how it can benefit your business, check out our Okappy Job Management features page.