Project Description
Getting started with Okappy
For a quick introduction to Okappy Job Management, check out our short demo video or the guide below.
Quick start guide
To start, simply log in with your email address and password.
Don’t worry if you have forgotten your password, you can always reset it by clicking the Problem logging in? link under Log in.
Okappy helps you manage your jobs and get rid of paperwork. So the first thing you can do is add a job.
1) Add a job
Click Add job from your ‘Jobs’ dashboard. The following screen will pop up.
You can select the type of job using one of our standard templates from the default job type option eg. Electrical, Plumbing or Standard.

Enter your job details by adding your customer, details of the job, address etc.
You can allocate the job to your employee/subcontractor. But note that you need to connect with your employee/subcontractor first (see below for more information on how to add an employee). Alternatively, leave the job as unassigned for now.
Go ahead and click Create Job.
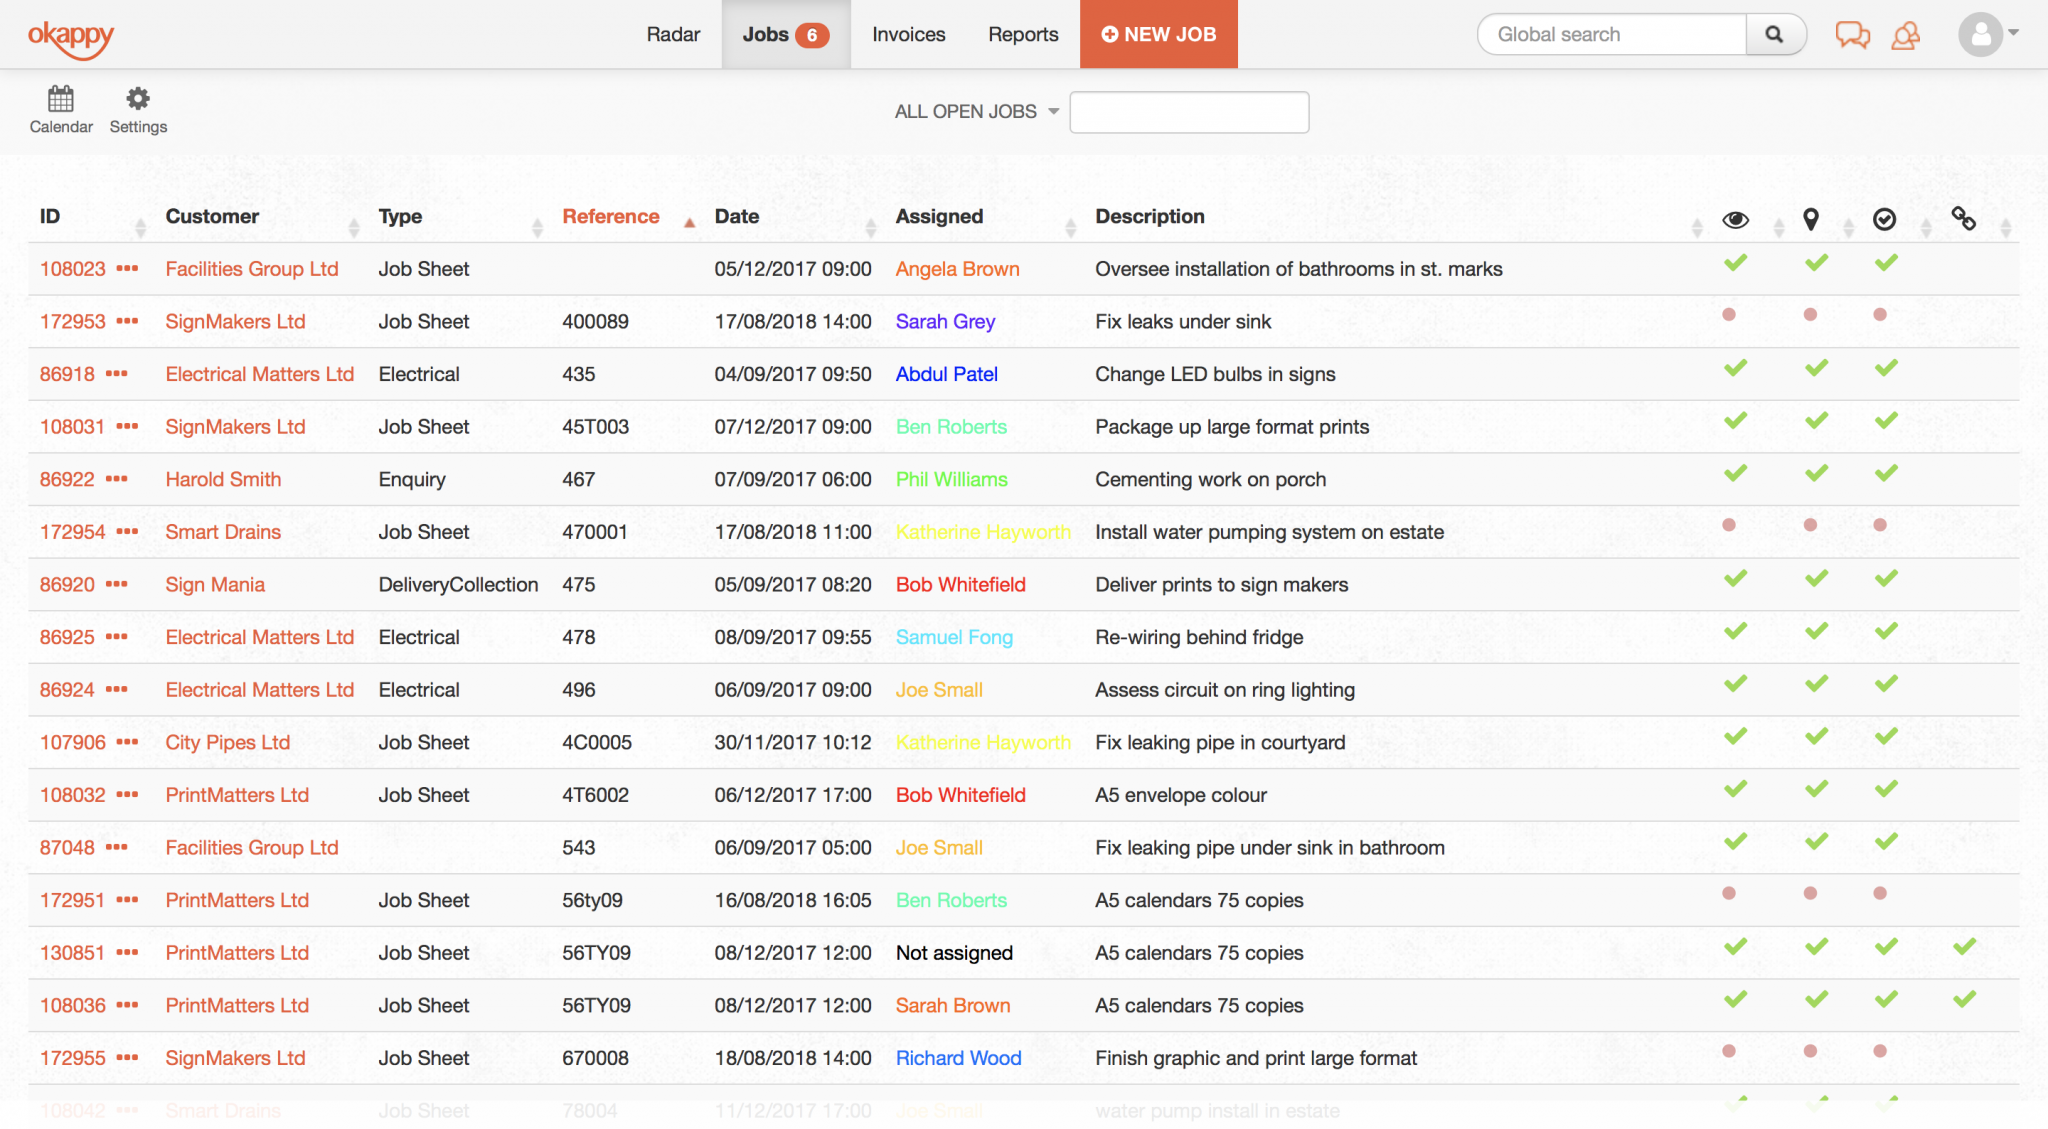
The Jobs dashboard will show the job you just created at the top of the list. As the job hasn’t been viewed yet, it will be highlighted with a red dot ( ![]() )
)
Click on the ‘more’ icon ( ![]() ) to view, edit or update a job. Once the job has been viewed from your computer, tablet or mobile phone, the job status will change to a green tick (
) to view, edit or update a job. Once the job has been viewed from your computer, tablet or mobile phone, the job status will change to a green tick ( ![]() )
)
For more details, see Okappy Dashboard – showing the status of your jobs.
2) Add an employee
To add an employee, click the connection icon ( ![]() ) on the top right of the screen and select Add employee.
) on the top right of the screen and select Add employee.

You can add your employee as an administrator or a standard user.
An administrator can view and edit jobs as well as change settings, whereas a standard user can only view the jobs allocated to him/her. For more details, see Okappy User Types.
Each employee is identified by their email address and this is where the login details will be sent. You can either create a password yourself or leave it blank and allow the system to create one for you automatically.
You also have the option to add an employee/subcontractor from our Monitor App. Click here to find out more.
Once you’ve added an employee, you can start allocating jobs to them. They’ll get a push notification of text when they receive a job.
3) Raise an invoice
Once a job is completed after the details of work done have been entered, you can raise an invoice to your customer.
To raise an invoice, click on the ‘more’ icon ( ![]() ) and then click Raise invoice.
) and then click Raise invoice.

Details of the work done will be automatically populated in the pop-up window. However, they can be amended if required.
Click on Raise invoice and it will immediately be available in your customer’s account.
You can also email the invoice to them and send a reminder, in the form of a text message, if you are concerned that the invoice may become overdue.
You can view all your raised invoices (as well as invoices you’ve received) by clicking on ‘Invoices’ from the tab bar.
The invoices option on your tab bar can be enabled or disabled by clicking on your name at the top-right of the screen, click Settings and tick next to the ‘Invoice’ option.
4) View the latest location of your engineers
To view the latest location of your engineers, simply click ‘Radar’ on the top-left of the nav bar.
For more details, see view the latest location and traffic condition.

We’ve quickly covered the main features of Okappy to help get you up and running. But there’s a lot more you can do!
Browse our Help and Support section for further information or simply give us a shout, we are happy to help.
If you haven’t already signed up to our free trial – click the button below!