The post All activity report appeared first on Okappy.
]]>All activity report
With Okappy, you can connect to your customers, employees and subcontractors. Send and receive work and see the status of that work as its updated by your engineer out in the field. You can also raise invoices, view the location of your engineers and send and receive messages.
What if you need a granular view of your activity over a period. Now you can see what was done when using the All activity report.
Read on to see how to generate a report showing all activity over a period.
Generate your activity report over a period of time
To generate the All activity report for a period of time
- Click Reports in the menu bar
- Select Other
- Click All activity
- Select the Start date and End date for the report (there could be a lot of entries so it may be best to choose a shorter time frame)
- Click Generate report

The report will be generated showing the following information
- The time and date of the activity
- Activity description
- Who was responsible.
Export your activity report
You can export your report to Microsoft Excel or Google Sheets where you can further manipulate the data, create charts and graphs or even generate beautiful dashboards which show your key metrics as they change over time.


Further information
For further information about the reports you can generate from within Okappy, check the reports section of our support site. Alternatively, check out the questions and answers in our forum.
The post All activity report appeared first on Okappy.
]]>The post Activity report appeared first on Okappy.
]]>Activity report
With Okappy, you can view the location of your engineers using the Okappy app or a gps tracking device.
Read on to see how to view the activity from a particular device.
Generate your activity report for a particular device
To generate the activity report for a device
- Click Reports in the menu bar
- Select Vehicles / devices
- Click Activity details
- Select the Start date and End date for the report (depending on the device settings there could be a lot of messages so it’s best to choose a shorter time frame)
- Choose the device
- Choose which messages to show
- Click Generate report

The report will be generated showing the following information
- The time and date the message was received from the device
- Device name
- Whether the device is visible on the radar screen or not
- The last location
- The speed at the time the message was sent
- The strength of the GPS signal
- The devices power
- Message type
Further information
For further information about the reports you can generate from within Okappy, check the reports section of our support site. Alternatively, check out the questions and answers in our forum.
The post Activity report appeared first on Okappy.
]]>The post Latest activity report appeared first on Okappy.
]]>Latest activity report
With Okappy, you can view the location of your engineers using the Okappy app or a gps tracking device.
Read on to see how to view the latest locations from all your devices.
Generate your latest activity report
To generate the latest activity report
- Click Reports in the menu bar
- Select Vehicles / devices
- Click Latest activity

The report will be generated showing the following information
- The time and date the message was received from the device
- Device name
- Whether the device is visible on the radar screen or not
- The last location
- The speed at the time the message was sent
- Message type
- The strength of the GPS signal
- The devices power
You can also click on the arrow to view the activity report for that particular device
Further information
For further information about the reports you can generate from within Okappy, check the reports section of our support site. Alternatively, check out the questions and answers in our forum.
The post Latest activity report appeared first on Okappy.
]]>The post Updating your business hours appeared first on Okappy.
]]>Updating your business hours
You can set your hours of operation or business hours in Okappy. This sets the default times on the calendar and various reports.
Read on to find out how to set your business hours.
Setting business hours
To set your business hours from within the jobs or calendar page
- Click Job options towards the top right of the page
- Select Business hours

- Change your start and end of day times

- Click Set business hours
The business hours will be updated in your calendar and reports.


For more information on the different reports available – see our help and support > reporting.
For further information
For further information search in our support pages or forum
The post Updating your business hours appeared first on Okappy.
]]>The post Searching for information appeared first on Okappy.
]]>Searching for information
Finding key information quickly is one of the things that differentiates Okappy from other software. With other systems you may have to search through lots of different pages or even through different applications.
With Okappy, all your information is available with a minimum number of clicks.
Read on to find out how to get find information quickly and easily using the smart filters or global search.
Using the smart filters
Smart filters are available throughout Okappy. You can use them to quickly search in your jobs screen, through your invoices, connections or in a generated report.
Start typing part of a word to quickly filter down to the relevant jobs or invoice etc which contain that word. You could try with a postcode, name or telephone number or any part of the description.
Smart filters are available in the following screens
- jobs dashboard
- invoices
- connections
- reports

Using the global search
Global search is also available throughout the app. Simply enter a word in the global search bar and click the magnifying glass to start searching.
The window will show the relevant results depending on what screen you are currently in. If you are in the jobs dashboard, the first results shown will be for any relevant jobs.

From there, you can also search other areas such as related invoices

You can search your Customers, or search support articles

For further information
For further information search in our support pages or forum
The post Searching for information appeared first on Okappy.
]]>The post Paid invoices report appeared first on Okappy.
]]>Invoices paid report
With Okappy, you can raise invoices to your customers as soon as the job is complete. All your invoices are available in the invoices dashboard. Your customers can pay your invoices through Okappy. As soon as your invoices is paid it will show as paid within the invoices dashboard. You can also run your Invoices paid report which shows all the invoices which have bene paid over a specific time frame.
To generate a report of invoices paid, follow the steps below.
Generate your paid invoices report
To generate a report of outstanding invoices
- Click Reports in the menu bar
- Click Invoices and then Invoices paid
- Select the date range
- Select which date to choose. This could be either
- When the invoice was added
- The tax date of the invoice
- Click Generate report

This will generate a report of the invoices which have been marked as paid showing the tax date of the invoice, invoice number, reference, status, customer, net amount and vat amount. You can also view the details of the invoice.

Export your invoices paid report
You can export your report to Microsoft Excel or Google Sheets where you can further manipulate the data, create charts and graphs or even generate beautiful dashboards which show your key metrics as they change over time.


Share your report
You can share your report by email to colleagues or your customer by clicking the email icon ( ![]() ) at the top of the report.
) at the top of the report.

Further information
For further information about the reports you can generate from within Okappy, check the reports section of our support site. Alternatively, check out the questions and answers in our forum.
The post Paid invoices report appeared first on Okappy.
]]>The post Outstanding jobs per customer, engineer and job type appeared first on Okappy.
]]>Outstanding jobs per customer, engineer and job type
With Okappy, you can see the outstanding jobs per customer, employee or subcontractor and job type.
There are a couple of ways you can do this, read on to find out more.
View outstanding jobs by customer, employee and job type in the job dashboard
To view outstanding jobs by customer, employee and job type on the job dashboard
- Click the filter
- Select Outstanding jobs
- Type in the customer name, job type and engineer’s name in the filter box
Check out the video below to see how it’s done.
View outstanding jobs by customer, employee and job type as a report
To view outstanding jobs by customer, employee and job type as a report
- Go to the Reports screen

- Click Jobs and then All jobs
- Enter a date range covering a period when the jobs were added
- Click Generate report

You can then type in the customer name, job type and the name of the engineer the job was assigned to.
Create a dashboard in Google Sheets
To create a dashboard in Google Sheets,
- Click the Google Sheets icon
- Click Copy formula
- Click Create a new sheet in the alert which pops up
- In the new Google sheets, select a cell and paste the copied formula

- Highlight the cells containing all the data which has been pulled down from Okappy

- Click Data
- Click Pivot table

- Check New sheet
- And then click Create

- Click into the pivot table and then select the following options in the pivot section on the right of the sheet
- Click Add in the Rows section
- Select customers
- Click Add in the Columns section
- Select Assigned
- Click Add in the Values section
- Select ID and then in the Summarise by option, select COUNT
- Click Add in the Filters section
- Select Status and select the following statuses: No status, On site and Work done
- Click Add in the Filters section again
- Select Type
- Select the relevant job type you want to see the data for

To have Google Sheets update the pivot table automatically.
- Go to tab which contains the original downloaded data
- Select the cell where you originally pasted the formula from Okappy
- Find the part of the formula which contains ToDate
=IMPORTDATA(“https://www.okappy.com/myautoalert/reports_export.jsp?ReportType=All+jobs&FromDate=01-01-2019+09:00&ToDate=29-08-2019+17:00&key=15569099553381b50cfe22c0a3167e174cef4dccd8&ForCID=-1&invoiceType=raised&UserID=2&description=-1″)
- Replace the data and time with &TEXT(TODAY(), “mm-dd-yyyy 23:59”)
=IMPORTDATA(“https://www.okappy.com/myautoalert/reports_export.jsp?ReportType=All+jobs&FromDate=01-01-2019+09:00&ToDate=”&TEXT(TODAY(), “mm-dd-yyyy 23:59″)&”&key=15569099553381b50cfe22c0a3167e174cef4dccd8&ForCID=-1&invoiceType=raised&UserID=2&description=-1″)
Create a dashboard in Excel
To create a dashboard in Google Sheets,
- Click the Excel icon to download the report to your computer
- Open the file

- Select rows 9 onwards

- Click Data
- Click Pivot table
- In the PivotTable wizard check
- Microsoft Excel List or database
- Click Next
- Ensure the range contains the data you have just downloaed
- Click Next >
- Check New sheet, and
- Click Finish

- Drop the Customer into the rows section
- Drop Assigned into the columns section
- Drop ID into the Data section
- Drop the Job type into the Page section
- Drop the Status into the Page section

- Right click within the pivot table
- Click Field settings
- Change Summarise by from Sum to Count

- To select outstanding jobs only, click the Status field
- Select No status, on site and Work done
Note: The ability to select multiple options is not available on older versions of Microsoft Excel
Further information
For further information about the reports you can generate from within Okappy, check the reports section of our support site. Alternatively, check out the questions and answers in our forum.
The post Outstanding jobs per customer, engineer and job type appeared first on Okappy.
]]>The post Ad hoc invoices report appeared first on Okappy.
]]>Ad hoc (search for invoices) report
With Okappy, your work information is available at the touch of a button. You can easily filter your invoices and search for particular invoices. You can also generate a report for all invoices containing a particular key word using the “Search for invoices” report.
To generate a report based off an invoice search, follow the steps below.
Generate your ad hoc (search for invoices) report
To generate a report of all jobs which contain a particular keyword
- Click Reports in the menu bar
- Click Invoices and then Search for an invoice
- Add your invoice ID, reference, address, postcode or description
- Click Generate report

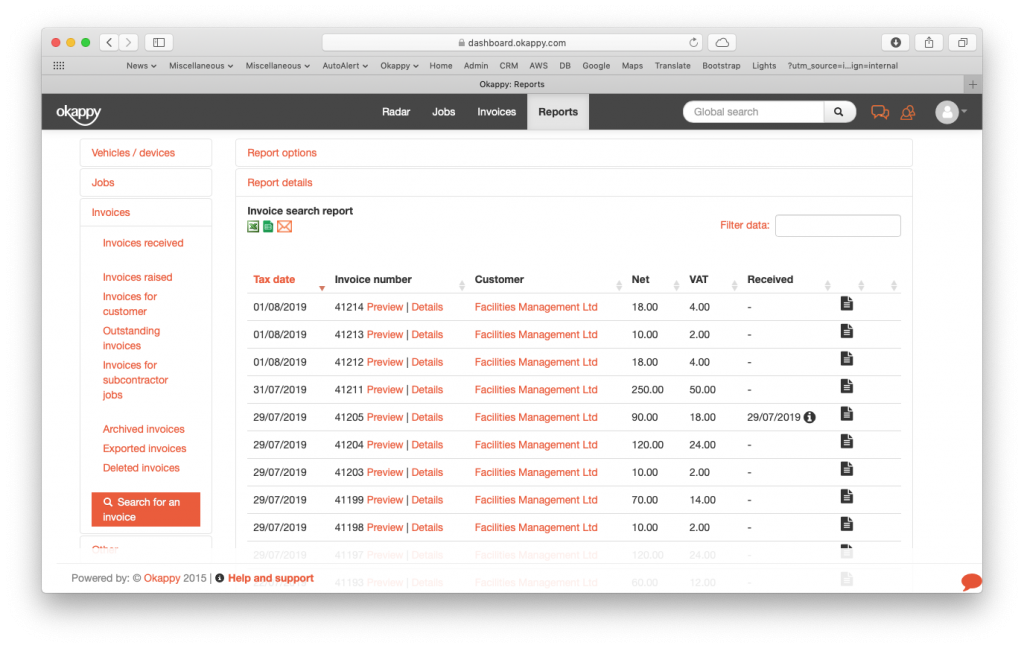
This will generate a report showing the Tax date, Invoice number, Customer, Net amount, VAT amount and whether the invoice has been paid.

Export your ad hoc (search for invoices) report
You can export your report to Microsoft Excel or Google Sheets where you can further manipulate the data, create charts and graphs or even generate beautiful dashboards which show your key metrics as they change over time.

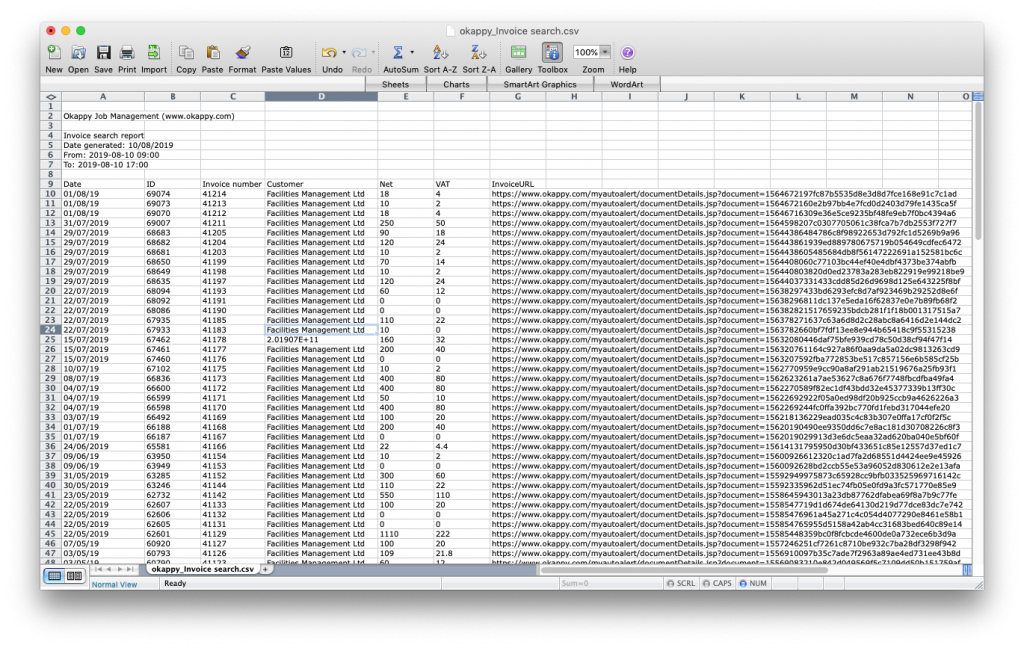
Export search invoices report to Excel

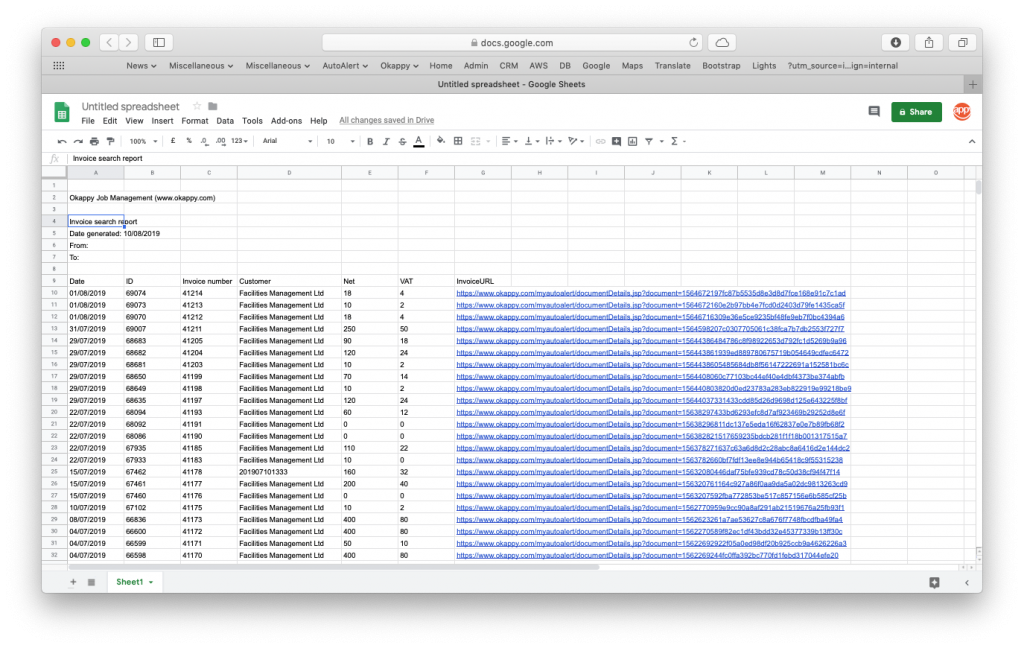
Export search invoices report to Google Sheets
Share your report
You can share your report by email to colleagues or your customer by clicking the email icon ( ![]() ) at the top of the report.
) at the top of the report.

Further information
For further information about the reports you can generate from within Okappy, check the reports section of our support site. Alternatively, check out the questions and answers in our forum.
The post Ad hoc invoices report appeared first on Okappy.
]]>The post Exporting contacts to Xero appeared first on Okappy.
]]>Exporting your contacts to Xero
Keeping your contacts in sync with Xero is easy with Okappy.
Whenever an invoice is exported to Xero from Okappy, Okappy will first check whether the invoice account existing in Xero and if not, it will create the contact in Xero.
However, what happens if you want to upload multiple contacts, i.e., when you are first setting up Xero. This is also easy with Okappy.
To upload multiple contacts to Xero, follow the steps below:
1. Generating your list of contacts in Okappy
You can export your customers or subcontractors into Okappy.
- Go to Reports
- Click Other
- Choose either to download either your Customers or Subcontractorts
Check our reporting support pages for more information on exporting your customers, or exporting your subcontractors.
2. Download the Xero export template
From within Xero,
- Click Contacts

- Click All contacts

- Click Import
- The import contacts download page will be shown

- Download the Xero contacts template file
The template file will be downloaded to your computer.
3. Copy your list of contacts
- Open the download file you created earlier with Okappy
- Open the Xero template file

- Copy and paste the contacts of the Okappy file into the Xero template file from row 2 onwards
- Ensure the details are in the correct Xero columns
4. Import your contacts into Xero
From the import contacts page in Xero

- Click Browse
- Select the Contacts.csv file you have just saved
- Choose whether to ignore empty fields. If you don’t ignore empty fields, any existing contact information will be deleted from within Xero
- Click Import

- Review the import summary
- If there are any issues,
- Click < Go Back
- Amend the details in the contacts.csv template
- Once you are happy, click Import again.
- In the summary page, click Complete import

Your contacts will be created in Xero.
The post Exporting contacts to Xero appeared first on Okappy.
]]>The post Exporting contacts to Mailchimp appeared first on Okappy.
]]>Exporting contacts to Mailchimp
In order to build your business, you may want to run a marketing campaign. For example, by sending an email to all customers or a subset of customers.
With Okappy and Mailchimp, this can be done in 3 quick steps. Read on for step-by-step instructions.
1. Generate your contacts list
First determine who you want to market to. This could be your customers, subcontractors or even employees.
Once you have decided, download the relevant report from Okappy. For further information see
2. Manipulate your list
Once you have your complete population, the next step is to determine who from that list you want to market to.
For example you could send an email to customers who you have not done any jobs for in the last 6 months or for those customers with site addresses in a certain geographical area.
3. Import your your finished list into Mailchimp
From within Mailchimp
- Choose your audience.

- Click Add contacts and then Import contacts

- Select the option for CSV or tab-delimited text file
- Click Continue To Setup >

- Click Browse and then find the spreadsheet containing your contacts
- Click Continue to Match

- For each column in the spreadsheet, if you want to import it, select edit
- Choose the relevant field you want to import into
- Click Save to move onto the next field
- If you don’t want to import the column, click Skip
- Click Continue to Organize >

- Add tags and choose the status of these contacts in Mailchimp
- Click Continue to Review >

- If you’re happy with the import, then choose Import
Your contact will be downloaded into your audience. You can then create your campaign and send them to your audience.
Further information
For further information on creating campaigns on Mailchimp, check out their Mailchimp 101. For more information on the different reports you can generate from Okappy, check out our Okappy support pages.
The post Exporting contacts to Mailchimp appeared first on Okappy.
]]>