If you’re often viewing the details of each job, and particularly if you have a lot of open jobs, here are 3 quick tips to save you time.

Tip 1 – Edit details without going into each job by hovering over the relevant details and then clicking the pencil icon to edit.
Tip 2 – If you are in the job details screen, using the back button rather than clicking Jobs at the top of the page saves the system reloading all your jobs. Particularly useful when you have a lot of jobs.

Tip 3 – Keep on top of your open jobs by automatically archiving your jobs when an invoice is raised or by bulk archiving your jobs periodically. See our archive jobs support article for more information.

Okappy is unique in that it is built around a network. Invite your customers and subcontractors to connect. Send and receive jobs and see the status of those jobs as they’re updated in real time by your employees or subcontractors out in the field.

Connect to your accounting package from the Invoice options menu towards the top right of the screen.
Once your submitted invoices are ready to export, click Invoice options again and then Export to …

You can update your jobs on your mobile device or from within the job dashboard.
You can change details of the job by clicking on each field in the dashboard. Or click the three dots menu and the View/edit/update job to go into the job details.
Change the status of the job by clicking Change status from the three dots menu or the Status dropdown from within the job.


Click the Reports tab to run reports to help manage all aspects of your business. View completed jobs, jobs for an employees, raised invoices, vehicle details and much more…
Download your reports to Excel or syncronise your data with Google Sheets.
Find out more about Reports

Click the connections icon ( ![]() ) to view your customer, employee and subcontractor database.
) to view your customer, employee and subcontractor database.
Quickly find a connection using the filter. Store documents, view notes, change settings and much more…
Find out more about Adding connections

This is where you’ll see your list of jobs. You can view options for each job by clicking the three dots ( ![]() ) menu.
) menu.
You can filter your jobs by entering text into the field at the top of the page or click All open jobs to use one of our canned filters.
Find out more about Adding jobs
If you find yourself switching between different screens such as the jobs screen, calendar, invoicing and reports screens. A quick tip to save time is to open each screen in a new tab (or new window).
That way you can quickly flick between each tab and work in that section of Okappy without loading each page from scratch each time.
A quick tip if you often want to send job sheets to multiple email addresses is to save the addresses in a note for that customer. Then it is easy to copy and paste the address the next time you send a job sheet.
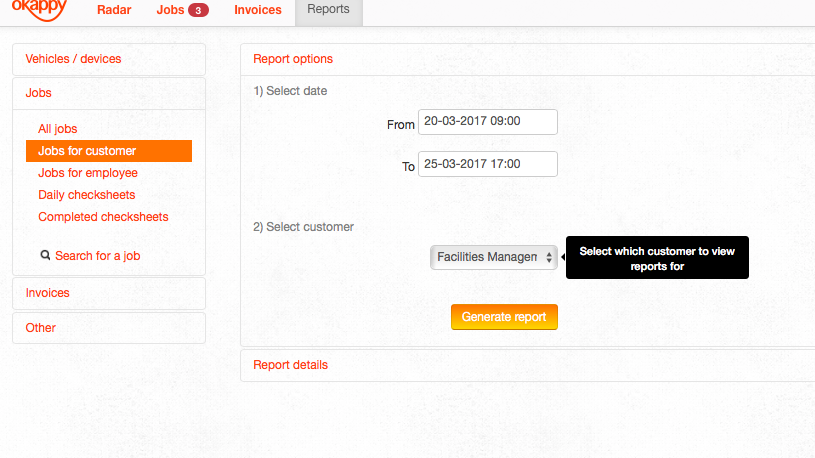
In the Reports tab, under the Jobs section of the sidebar on the left:
- Click on ‘Jobs for customer’.
- Select the time range you want the report to cover (From/ To).
- Select the customer you want to run the report for.
- Click on ‘Generate report’.
Once the report has run, you can either export the data to Excel or email the report to yourself or to your customer. In case you’d like to look at a particular job, you also have the option to view or edit the job straight away by clicking on View | Edit next to the job ID.

You can easily customise the layout of your Job Dashboard and focus only on the information that matter to you.
Click on the settings icon ( ![]() ) next to the Add job button, then choose Change page layout. Select which column(s) you want to show or hide on the page or create additional columns specific to your business. Any changes you apply will affect all your users.
) next to the Add job button, then choose Change page layout. Select which column(s) you want to show or hide on the page or create additional columns specific to your business. Any changes you apply will affect all your users.

If, for whatever reason, your engineer can’t update the job from the mobile app, you can always update it from the desktop.
Simply click on the job ID and change the status to ‘Work done’.
A modal will pop up with the work done sheet, you can then fill in the details for your engineer. Once finished click on ‘Update work done’.
The work done details are updated. You can now change the job status from ‘Work done’ to ‘Completed’.

A quick way to see if your invoices raised are paid or unpaid is to run a report of Invoices raised within a time range and see which ones are marked as payment ‘Received’.
Go to Reports, click on Invoices raised. Select on the date to run it from, then click on Generate Report.
The report will show the list of invoices raised within the time range you set. At a glance, you’ll be able to see if a payment was received or not for each invoice.
The payment will either be ‘Marked as received’ (where user manually clicks on the ‘Received’ button in their Invoices dashboard) or ‘Received via Okappy’ (customers pay by clicking the green ‘PAY INOVICE’ button via Sage Pay).
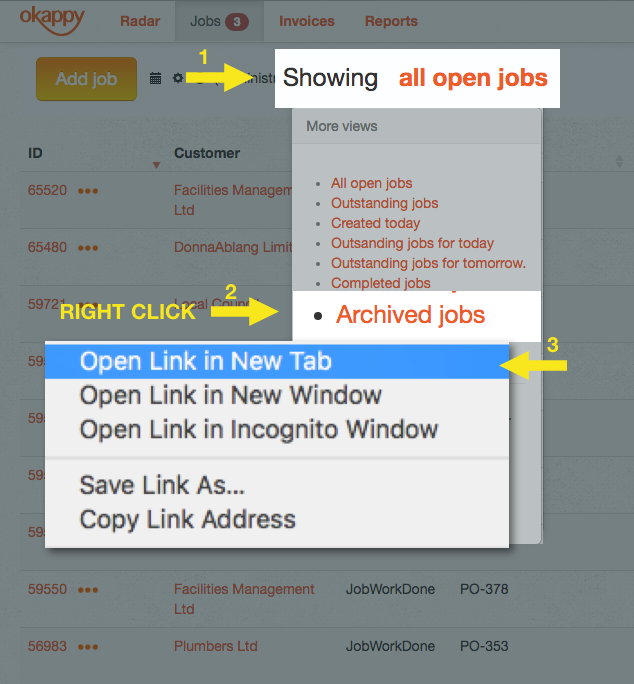
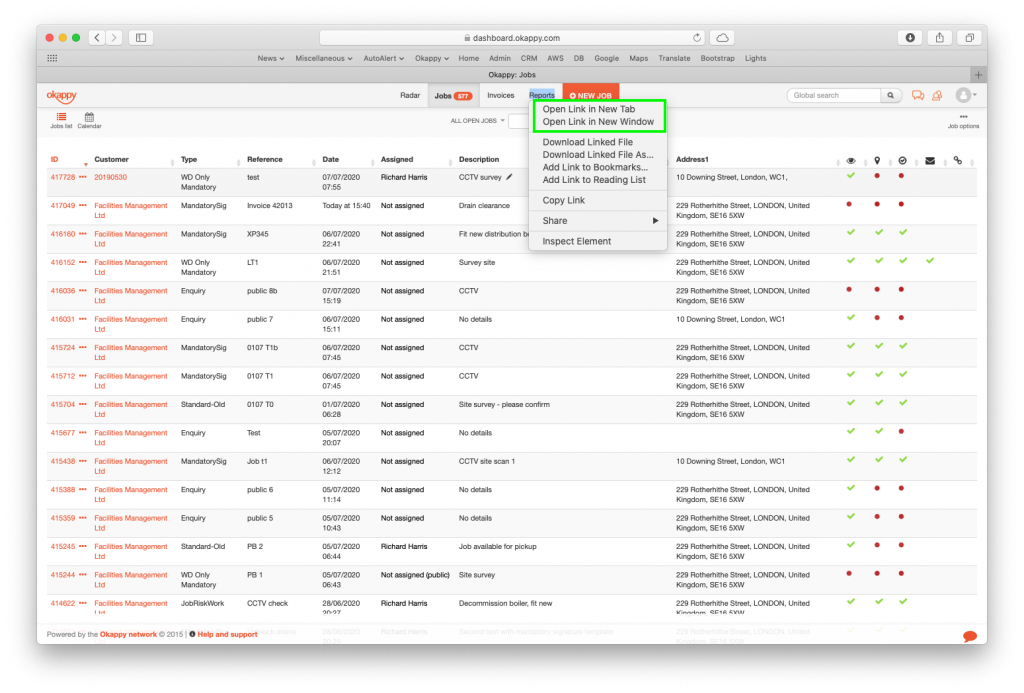
As you use Okappy more and more, the list of completed and archived jobs gets bigger and bigger every day. If you frequently go back and forth between the dashboard and the list of archived jobs, things might start slowing down a bit as the system needs to load thousands of jobs on the page, including their related info and attachments (videos, images, …) every time you click on ‘Archived jobs’.
If you often need to access the ‘Archived jobs’ filter, a quick and useful workaround is opening that link onto a new tab (right click + ‘Open in new tab’, see image below) and leave it open in the background. This way, since the page has loaded all the archived jobs already, you can just switch tab and quickly filter through the list with immediate results.
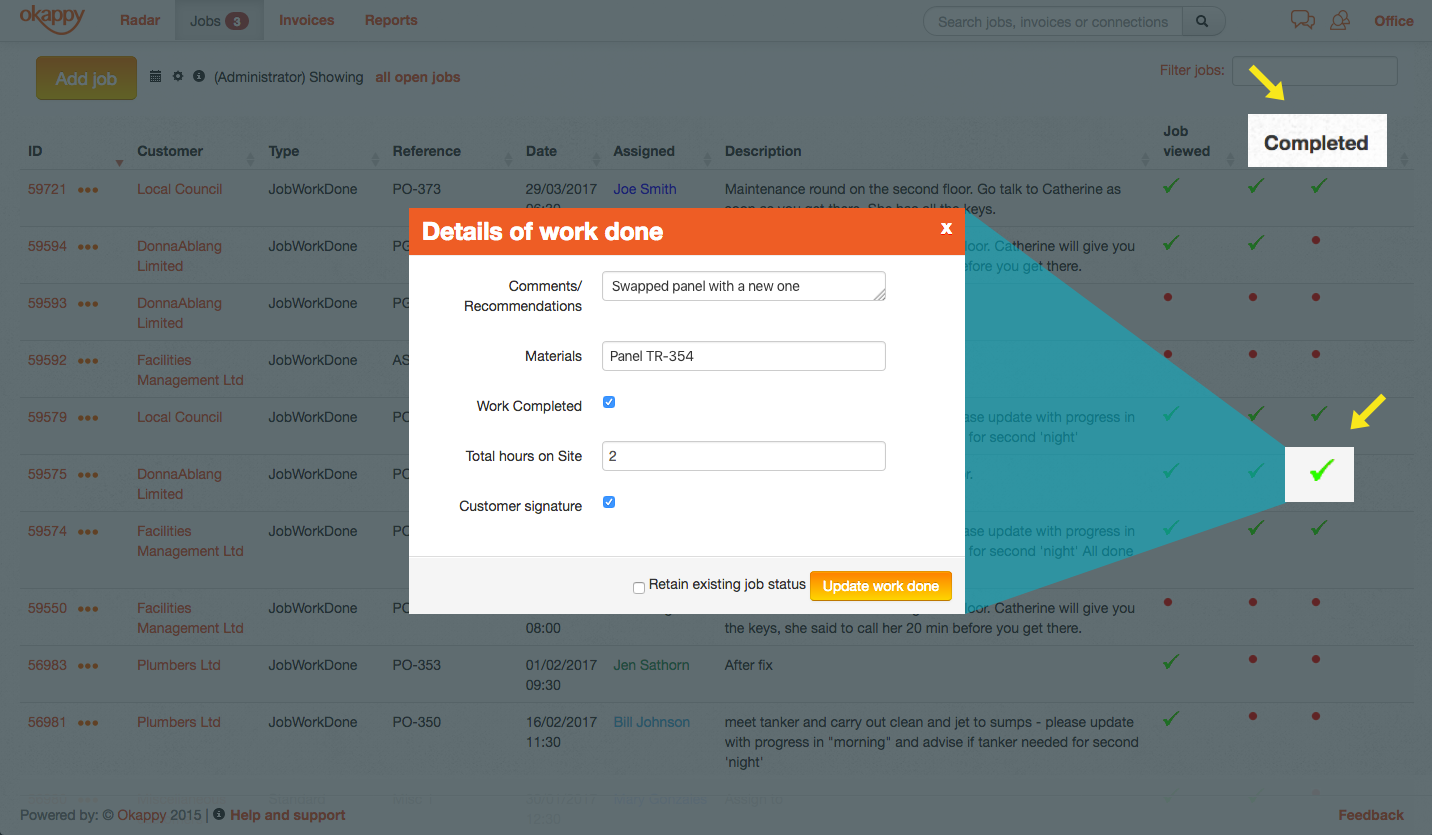
In the Jobs dashboard, once a job is completed, there’s a quick way to view the details of the work done by your engineer. Click on the green tick icon under the ‘Completed’ column and a modal containing the details of the work done will pop up, allowing for a quick browse.
The quickest way to copy and paste text is by using keyboard shortcuts.
On regular actions like copying and pasting they can save you hours every month.
Start by highlighting the text you want to copy, then:
Windows users:
Press Ctrl + C (copy) then Ctrl + V (paste).
Mac users:
Press cmd + C (copy) and cmd + V (paste)
Think of all the times you right-click to select ‘Copy’, move the cursor and then right-click again to select ‘Paste’ or, even longer, if you select Copy and Paste from the Edit menu at the top of your software…so much time wasted in the long run.
Because of their immediacy, keyboard shortcuts are the way to go.
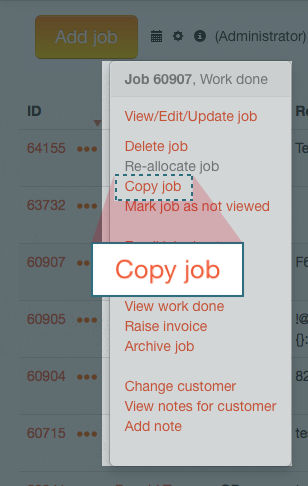
When you need to create a new job with the same information as an already existing one, click on the 3-dots icon ( … ) next to the job ID of the job you’d like to copy and select Copy job from the pop up menu. It will create a brand new job with the same info like customer details, site address etc. You also have the option to copy across any attachments from the existing job.

You can raise multiple invoices against a job. Simply click on the three dots next to the job ID (…), then click Raise invoice.
If you’ve already raised an invoice previously, an alert message will appear saying An Invoice for the job has already been raised. See Invoice. It’s just a reminder, you can carry on and raise more invoices as required.
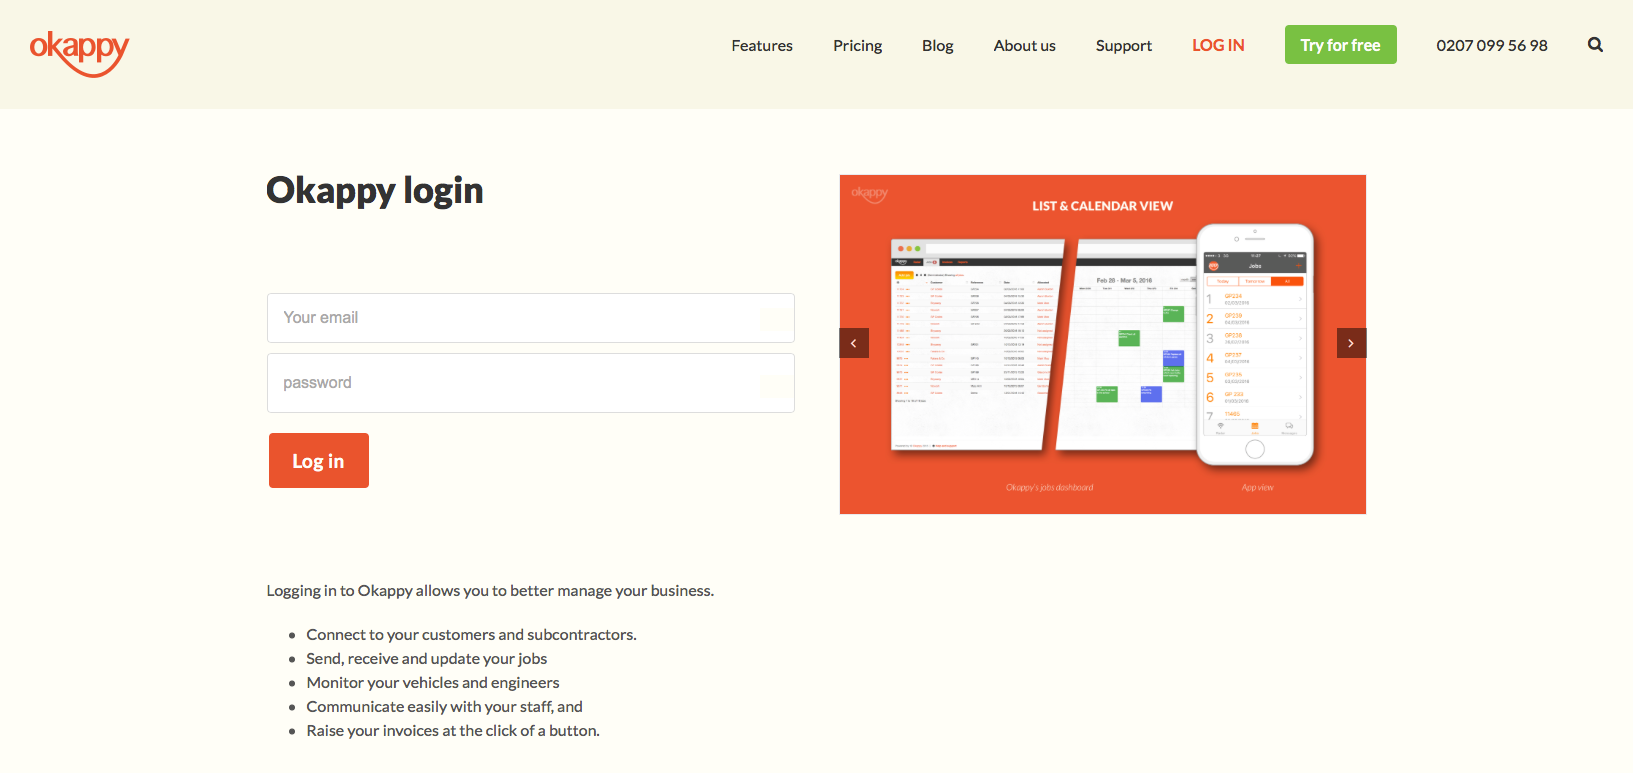
A quick way to log into Okappy is to bookmark our login page, save the bookmark on your browser’s toolbar for quick access and allow the browser to store your login credentials (you’re usually prompted to do so). Next time you need to login all you’ll have to do is clicking once on your bookmark and voilá, you’re in. Time saved = ~5 secs, not bad if you think how many times you login throughout the year 🙂
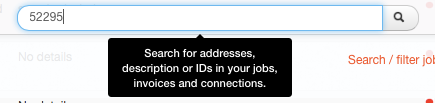
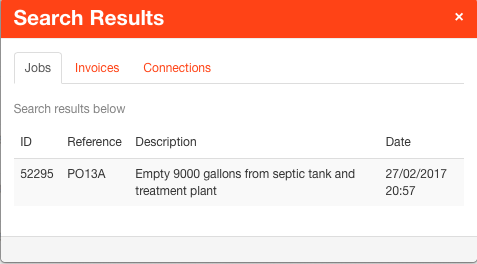
Enter at least three characters from any address, description or ID related to your Jobs, Invoices and Connections and the system will instantly display the findings in a pop-up box (image 2).
From here, click on any of the search results to view or edit its details.
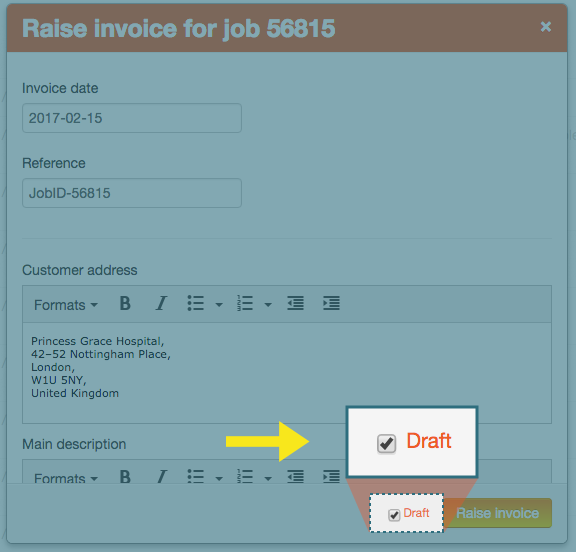
Still waiting for information to be added to your invoice?
Don’t worry, you can always raise an invoice as a draft and continue to edit it. Once you’ve filled in all the required details and are happy with it, you can then submit the invoice.
|
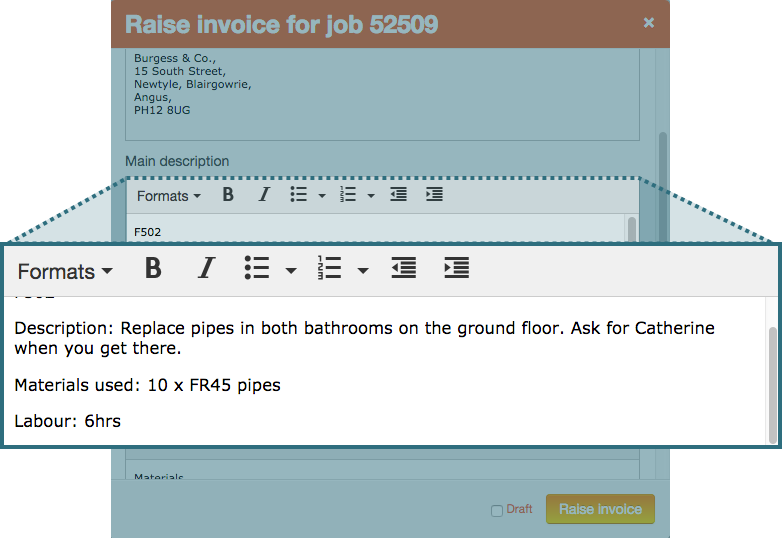
We can help you to amend the settings to bring in job information like reference, work done, description, address etc. automatically into the invoice when you click on Raise invoice. This will save you from typing or copying and pasting information from one place to the other. |
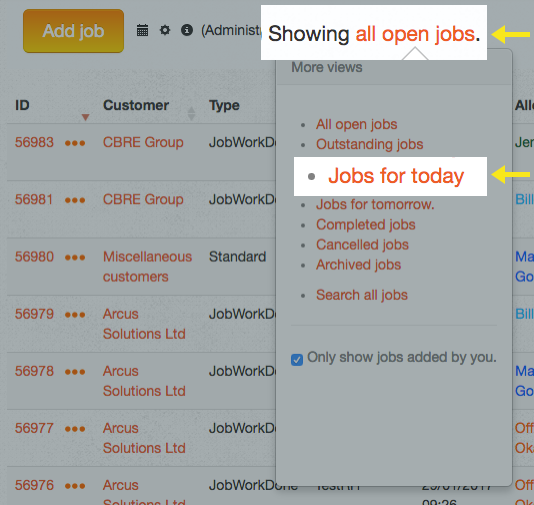
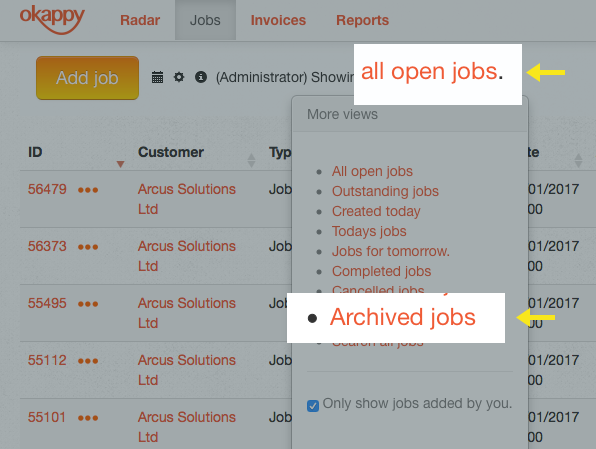
From the job dashboard, simply click on all open jobs and then select Jobs for today.
From this popup menu you can also quickly see your outstanding jobs, archived jobs, jobs created today and much more.
|
From the Jobs dashboard, click on all open jobs, then Archived jobs and you can immediately see all the jobs that have been completed and archived. Click on the job ID or the three orange dots ( … ) to view job details or raise an invoice for that job (or a second invoice if one had previously been raised). |
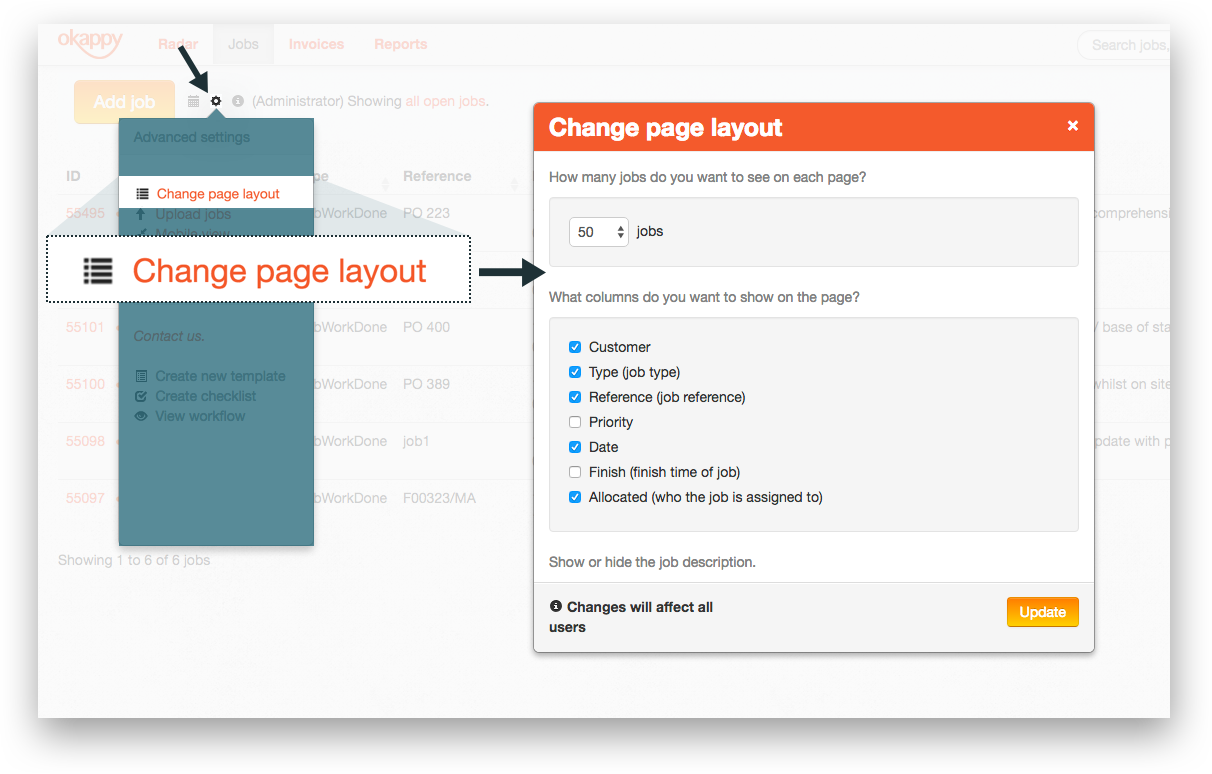
You can easily customise the layout of your Jobs dashboard and focus only on the information that matters to you.
Click on the settings icon (the cog) next to the Add Job button, then choose Change page layout. Select which column(s) you want to show or hide on the page or create additional columns specific to your business. Any changes you apply will affect all your users.
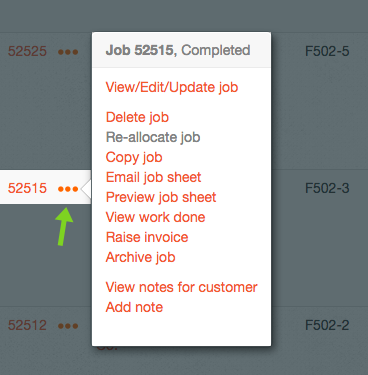
A quick way to view a list of options related to a job is by clicking the 3-dots icon ( … ) next to the Job ID. The pop-up menu lists a series of tasks related to that specific job.
It’s a quick and simple way, with just two clicks, to perform a task like Preview job sheet or Email job sheet, right from the dashboard, rather than going into the job’s info page and look for the icon to click on there.
In the Jobs’ dashboard, next to the Job ID, there’s an icon with 3 orange dots. Click on it and a pop up box will appear with a ‘Delete job’ link.
Note: In certain circumstances, i.e., if the job has been added or allocated to a connection then the job cannot be deleted. You can still remove the job from your dashboard by archiving the job instead.


Simply un-tick the box “Advise customer that an account has been set up for them” at the bottom of the ‘Add customer’ modal.
The customer won’t get a notification then.